Build a controlled form with multiple fields and a checkbox. On submit, show collected data and reset the form.

Business case. LeadCapture — mini lead form: name, email, message and newsletter consent.
What To Do
- Make all fields controlled: values from state, update via
onChange. - Enable the Submit button only when name and email are filled.
- On
onSubmit, assemble the data object and display it below. - Reset the form after submit.
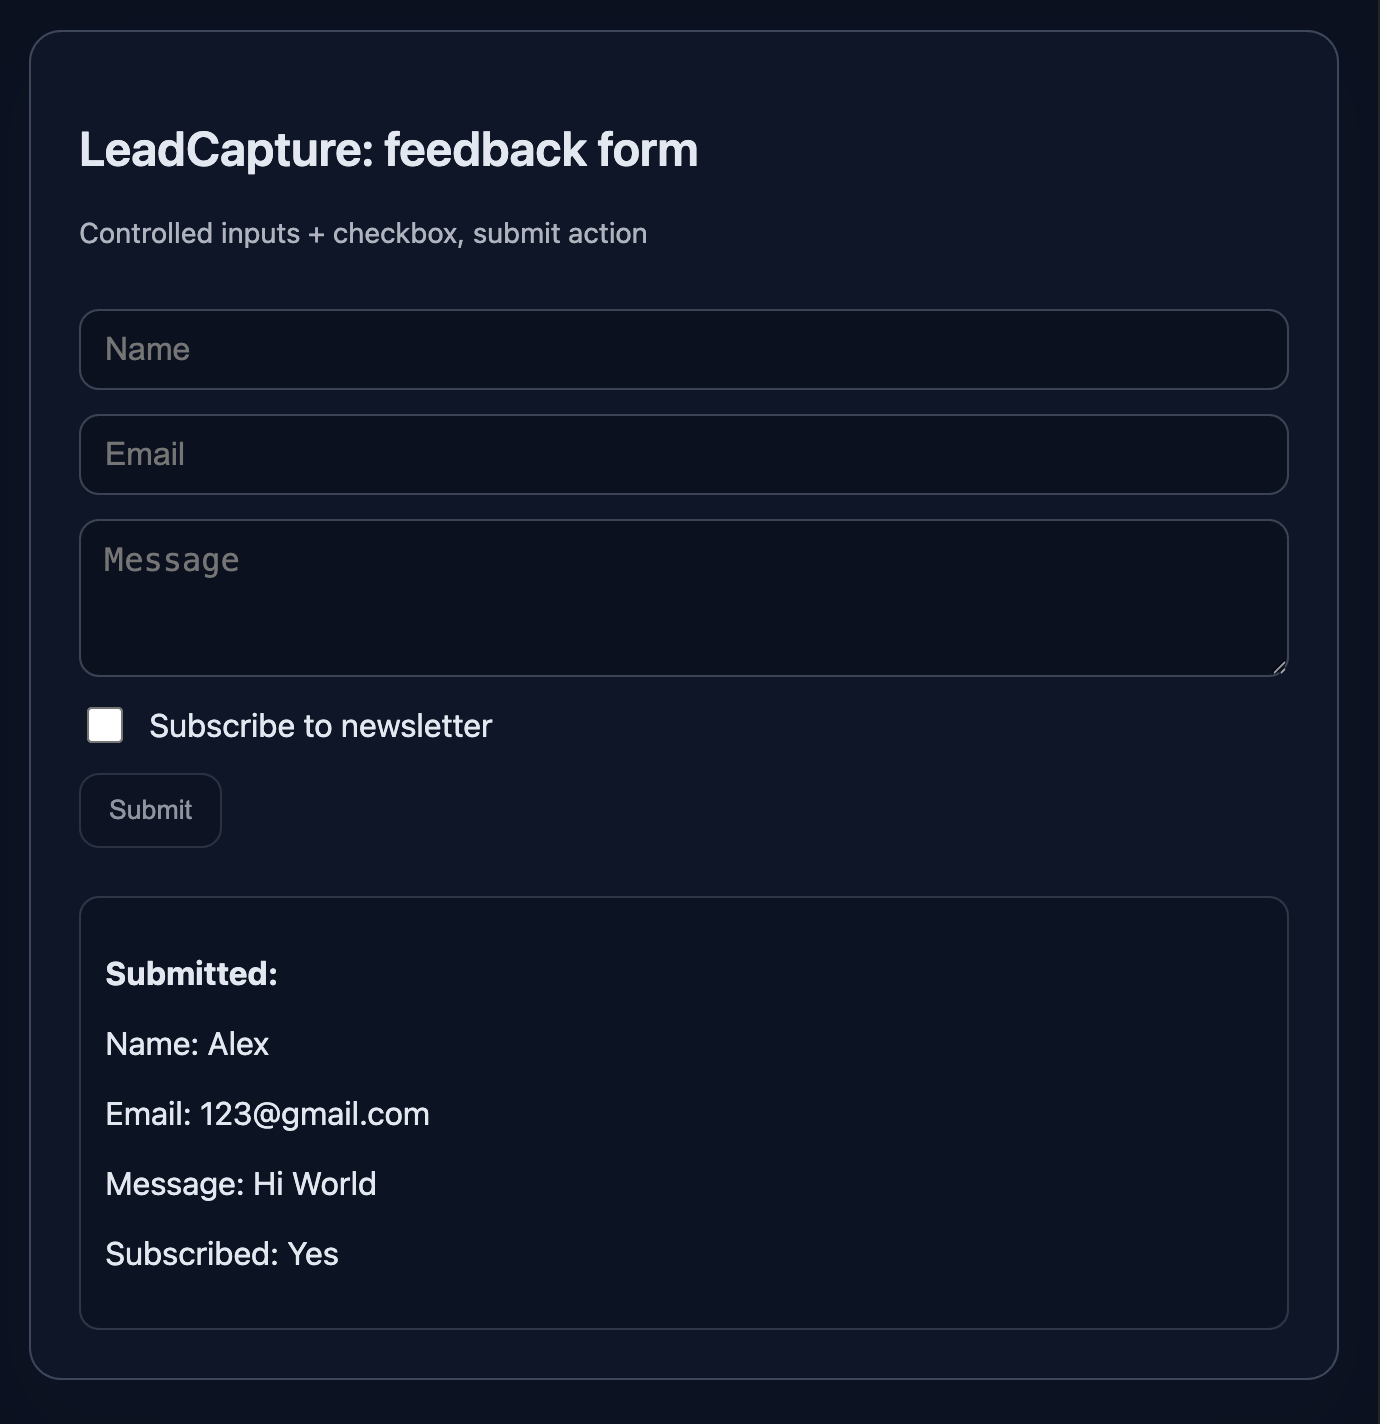
Final View
A card with form fields, checkbox, submit button, and a “Submitted” block.
Preview:
💡 Hint
- State:
const [name, setName] = useState(''), similarly for others. - Button:
disabled={!name.trim() || !email.trim()}. onSubmit:e.preventDefault();collect{ name, email, message, subscribe }, display, and reset fields.- Extract
canSubmitto a variable for readability.
👀 Solution
import React, { useState } from 'react';
import './styles.css';

export function FeedbackForm() {
  const [name, setName] = useState('');
  const [email, setEmail] = useState('');
  const [message, setMessage] = useState('');
  const [subscribe, setSubscribe] = useState(false);
  const [submitted, setSubmitted] = useState(null);

  function handleSubmit(e) {
    e.preventDefault();
    const canSubmit = name.trim() && email.trim();
    if (!canSubmit) return;
    setSubmitted({ name, email, message, subscribe });
    setName('');
    setEmail('');
    setMessage('');
    setSubscribe(false);
  }

  const canSubmit = name.trim() && email.trim();

  return (
    <article className="card" data-testid="form-card">
      <header>
        <h2 className="title">LeadCapture: feedback form</h2>
        <p className="subtitle">Controlled inputs + checkbox, submit action</p>
      </header>

      <form className="row" onSubmit={handleSubmit} aria-label="form">
        <input
          className="input"
          type="text"
          placeholder="Name"
          value={name}
          onChange={(e) => setName(e.target.value)}
          aria-label="name"
        />
        <input
          className="input"
          type="email"
          placeholder="Email"
          value={email}
          onChange={(e) => setEmail(e.target.value)}
          aria-label="email"
        />
        <textarea
          className="textarea"
          placeholder="Message"
          value={message}
          onChange={(e) => setMessage(e.target.value)}
          aria-label="message"
          rows={3}
        />
        <label className="checkbox-row">
          <input
            className="checkbox"
            type="checkbox"
            checked={subscribe}
            onChange={(e) => setSubscribe(e.target.checked)}
            aria-label="subscribe"
          />
          <span>Subscribe to newsletter</span>
        </label>
        <div className="actions">
          <button className="button" type="submit" disabled={!canSubmit}>Submit</button>
        </div>
      </form>

      {submitted && (
        <section className="result" aria-label="result">
          <p><strong>Submitted:</strong></p>
          <p>Name: {submitted.name}</p>
          <p>Email: {submitted.email}</p>
          <p>Message: {submitted.message}</p>
          <p>Subscribed: {submitted.subscribe ? 'Yes' : 'No'}</p>
        </section>
      )}
    </article>
  );
}

export default function App() {
  return (
    <main className="challenge-container">
      <section>
        <FeedbackForm />
      </section>
    </main>
  );
}React: Controlled Form with Submit
Build a controlled form with multiple fields and a checkbox. On submit, show collected data and reset the form.
Business case. LeadCapture — mini lead form: name, email, message and newsletter consent.
What To Do
- Make all fields controlled: values from state, update via
onChange. - Enable the Submit button only when name and email are filled.
- On
onSubmit, assemble the data object and display it below. - Reset the form after submit.
Final View
A card with form fields, checkbox, submit button, and a “Submitted” block.
Preview:
💡 Hint
- State:
const [name, setName] = useState(''), similarly for others. - Button:
disabled={!name.trim() || !email.trim()}. onSubmit:e.preventDefault();collect{ name, email, message, subscribe }, display, and reset fields.- Extract
canSubmitto a variable for readability.
👀 Solution
import React, { useState } from 'react';
import './styles.css';

export function FeedbackForm() {
  const [name, setName] = useState('');
  const [email, setEmail] = useState('');
  const [message, setMessage] = useState('');
  const [subscribe, setSubscribe] = useState(false);
  const [submitted, setSubmitted] = useState(null);

  function handleSubmit(e) {
    e.preventDefault();
    const canSubmit = name.trim() && email.trim();
    if (!canSubmit) return;
    setSubmitted({ name, email, message, subscribe });
    setName('');
    setEmail('');
    setMessage('');
    setSubscribe(false);
  }

  const canSubmit = name.trim() && email.trim();

  return (
    <article className="card" data-testid="form-card">
      <header>
        <h2 className="title">LeadCapture: feedback form</h2>
        <p className="subtitle">Controlled inputs + checkbox, submit action</p>
      </header>

      <form className="row" onSubmit={handleSubmit} aria-label="form">
        <input
          className="input"
          type="text"
          placeholder="Name"
          value={name}
          onChange={(e) => setName(e.target.value)}
          aria-label="name"
        />
        <input
          className="input"
          type="email"
          placeholder="Email"
          value={email}
          onChange={(e) => setEmail(e.target.value)}
          aria-label="email"
        />
        <textarea
          className="textarea"
          placeholder="Message"
          value={message}
          onChange={(e) => setMessage(e.target.value)}
          aria-label="message"
          rows={3}
        />
        <label className="checkbox-row">
          <input
            className="checkbox"
            type="checkbox"
            checked={subscribe}
            onChange={(e) => setSubscribe(e.target.checked)}
            aria-label="subscribe"
          />
          <span>Subscribe to newsletter</span>
        </label>
        <div className="actions">
          <button className="button" type="submit" disabled={!canSubmit}>Submit</button>
        </div>
      </form>

      {submitted && (
        <section className="result" aria-label="result">
          <p><strong>Submitted:</strong></p>
          <p>Name: {submitted.name}</p>
          <p>Email: {submitted.email}</p>
          <p>Message: {submitted.message}</p>
          <p>Subscribed: {submitted.subscribe ? 'Yes' : 'No'}</p>
        </section>
      )}
    </article>
  );
}

export default function App() {
  return (
    <main className="challenge-container">
      <section>
        <FeedbackForm />
      </section>
    </main>
  );
}🧑💻 It's not a bug! It's a feature!
The code editor is intentionally hidden on mobile.
Believe me, it's for the best: I am protecting you from the temptation to code in less-than-ideal conditions. A small screen and a virtual keyboard are not the best tools for a programmer.
📖 Now: Study the task, think through the solution. Act like a strategist.
💻 Later: Sit down at your computer, open the site, and implement all your ideas comfortably. Act like a code-jedi!